
An introduction
Originally I had one long post that contained all, but I decided to split the post into separate items. This is the tip and tricks part.
Tips and tricks
So next follow some tips and remarks and if you are the kind that likes to suffer discover everything yourself then by all means: stop reading.

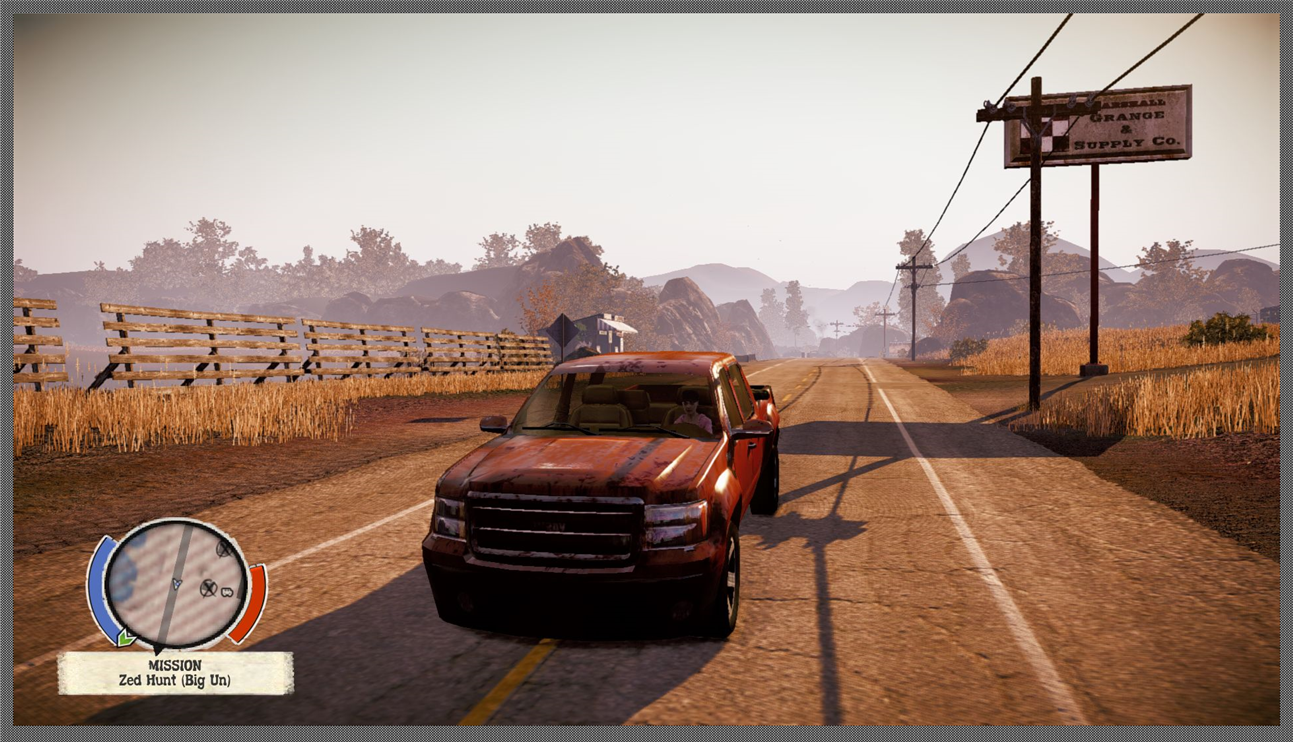
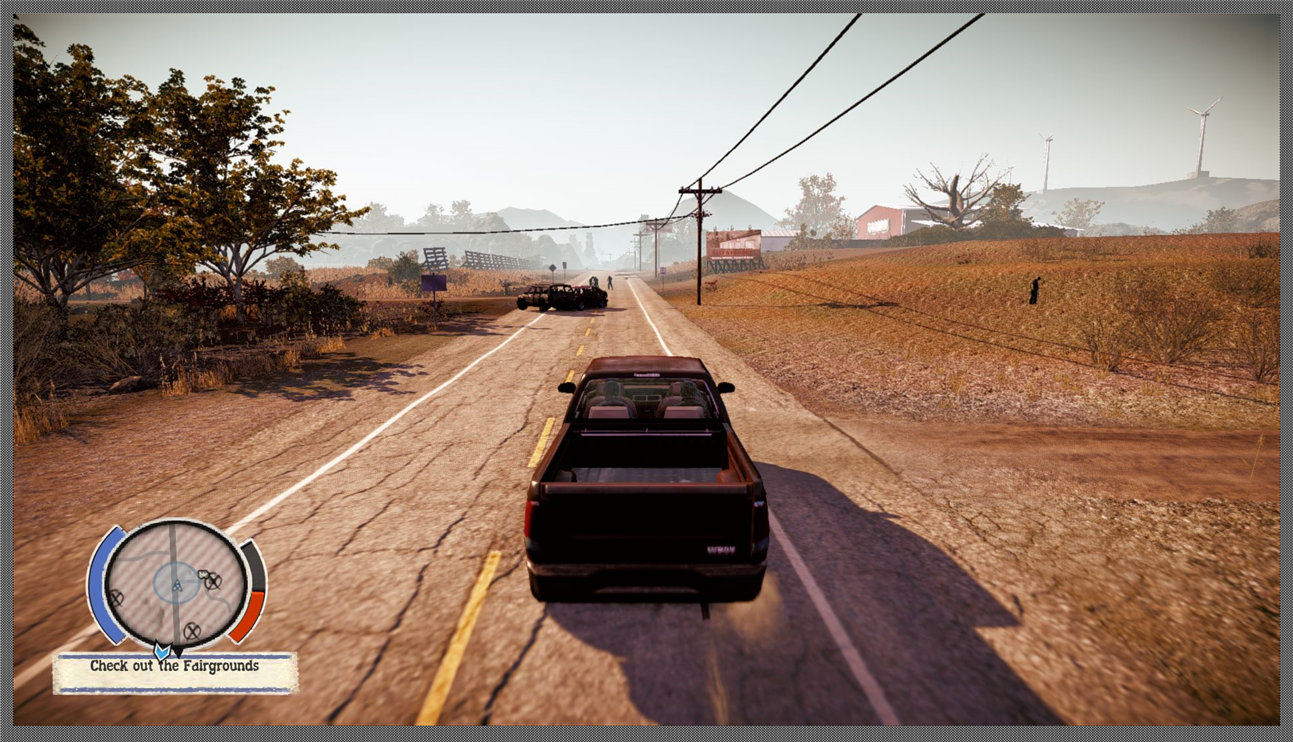
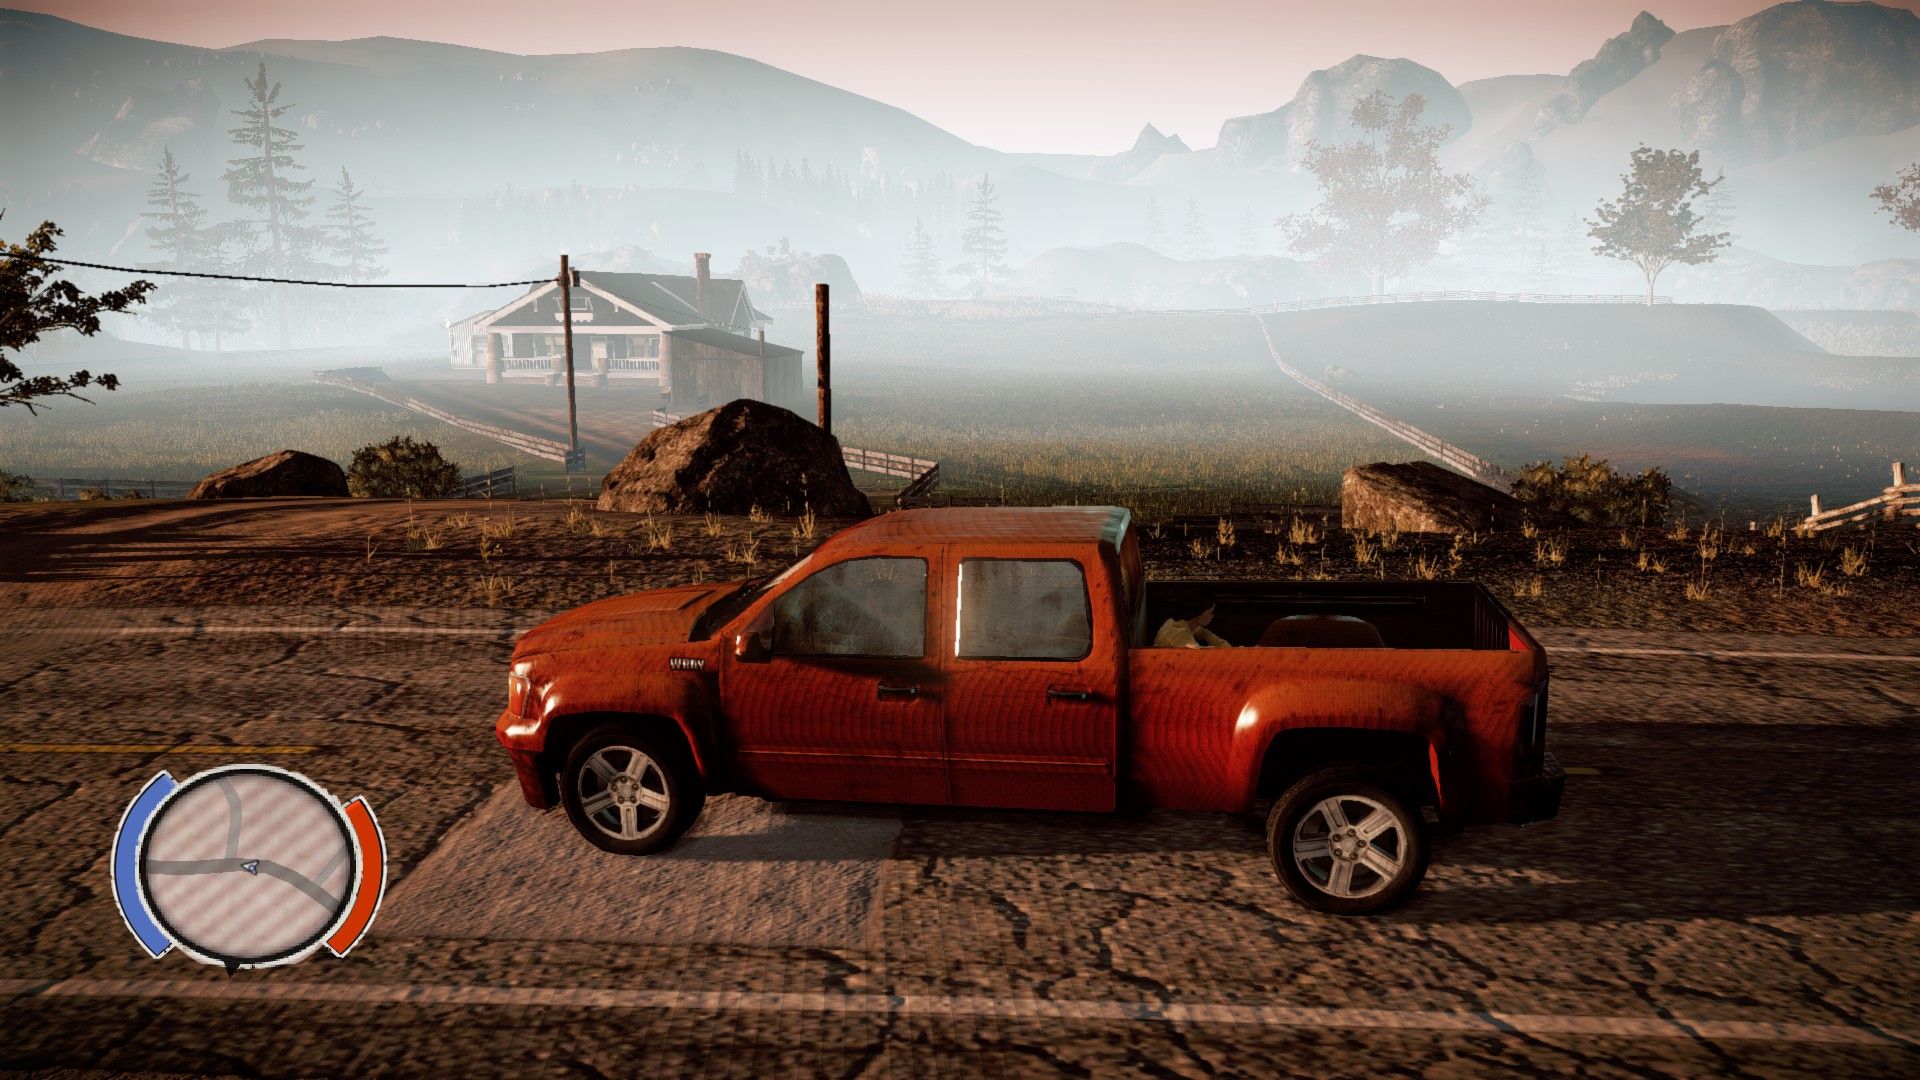
Cars!
There are all kinds of cars in the game but for durability the one in the two pictures above is the best one. The modern pickup, as the game calls it, is a big monster that can run down several hordes and show nothing for it.. ok.. a dent or two. All other cars break down far too soon.
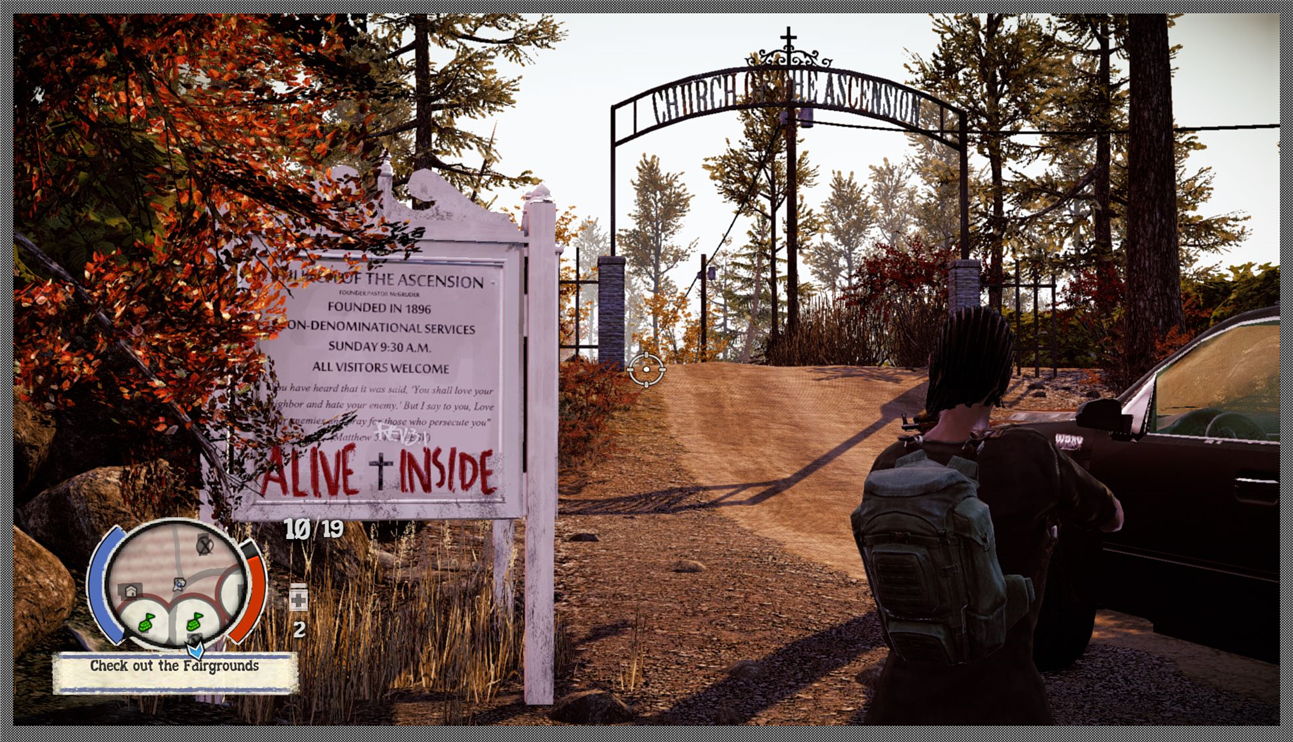
When you leave the ranger station in the introduction game you will ride towards in the Church of the Ascension and just before you enter the village Spencers Mill there is a car accident scene of two cars crashed into each other. To the left side you see a modern pickup parked. Get it. Get all the modern pickups you can get your hands on! For you need a lot of them as you have one that you use and the rest will be repaired while you are squatting hordes.
Cars will be repaired slowly when you park them near your home base and you have at least a workshop. According to the rules only the car in the car space, but curiously enough any car parked nearby the Snyders trucking warehouse would end up repaired overtime.
Do not park too many cars near your home base.. I did once and one disappeared because someone took it out for spin and never returned it. At Snyders I got this event when I had eight cars parked around it.
The modern pickup has two disadvantages.. it is a big machine that can not move easily around in close spaces and it is not the fastest car, although it is not the slowest car either.
Be aware that cars are zombie magnets. They will gather around your car while you are out doing missions or exploring a house.
Cars have a horn.. Press Q and it will make a loud noise. This is very useful during missions in which you have to lure away zombies or draw out zombies into the open.
(Update November 2013)
Be careful with driving cars cross country or over uneven terrain. The physics in the game are somewhat unpredictable and it could mean your car will end up belly up.. and you will be ejected and find yourself stuck in the middle of nowhere.

- The first modern pickup you encounter is to the left in the picture. There is a catch because when you get close zombies will spawn. No worries though.. you have three people to deal with them: Marcus, Maya and Ed.. oh and Ed might look in a bad shape, but he still can swing a bat around quite well.


Outposts(and resource gathering)
When you acquire the first home base(the Church of the Ascension) you still can not do everything you need to do. Noticeably you can not establish an outpost. This option comes available after doing the first survey mission Lily gives you and before the Mission: Survivors. And you can establish an outpost via the Radio Assistance which is called using the LEFT ALT button.
Outpost also create resources. They work as follows. They will create 3 resources of the kind you see displayed on the map and only the first one. Even if more resources are shown it will just create three of the one that is shown on the map. To do this it needs 1 material. When there are no resources left an outpost creates 3 ammo. You can also have 3 materials created in an place that has materials, which also cost 1 material for a net result of 2 materials. For the Trucking warehouse the cost of eight outposts is eight materials.. with which you can produce 24 resources so you gain 16 resources. It is one of the reasons I prefer the Trucking warehouse.
Note that turning a place into an outpost makes all items and resources in that place unavailable for gathering. So remove as much items as you can before you turn them into outposts. (Update: October 2013) a recent test shows them to be available.. which might have been due to a patch or a bug so now you can move items from the store you turned into an outpost into the store.
(Update November 2013)
In some blog posts it was suggested that resources re-spawn. The idea was not take all the items inside a container. Eventually new items will show up. I have run a few test games leaving items behind(mostly things like fire-crackers and dolls.) I have yet to experience any regeneration of items. In fact items will simply disappear and buildings will be marked with nothing left and there will be no containers.
IMPORTANT: containers that have resources inside them will only disappear when you empty them of their resources. So these resources will not disappear during the game like items will. But mark this: buildings will be marked with nothing left even when they still contain resources. Thus the marking on the map that there is nothing left is about items.. and not about resources.
Homebases
(change)
Homebases are the places where your group of survivors hide out, where you can stash supplies and equipment and repair weapons and cars. Most home bases have slots available to create a workshop, garden, watch tower and the like. Some of these can be upgraded. Some of these repair your cars, others you can use to make medicines and yet others allow you to make ammo.
There are several potential home bases available. The State of Decay wiki neatly lists them so you can select the one you like to have. I have played twice now and choose the Snyders trucking warehouse both as it is the biggest available early in the game, has a lot of space to store goods, can have up to eight outposts and can be easily defended by four outposts or even three. The other you can use around the map to create safe havens.
The option to relocate a home base appears only after your get the Mission: Home Away From Home. This mission will appear as part of the first quests but the real trigger is not clear to me.
A relocation does not cost the materials that are mentioned, it just requires you to have that many. So when you need 50 materials to have a home base relocated it will not use them.
Update(november 2013)
After some testing I observed the following in the game in regard to home bases..
In the game there are seven potential home bases. However the options are much more limited than this might suggest.
Choosing which home bases seems to have no impact on the resource needs. It does not matter if you choose a big home base or a small base.. they cost the same.. What makes a base more expensive is that daily resource costs seems influenced by what you build, your equipment, the amount of survivors and cars you have. Since a bigger home base has more slots to build it eats up more resources when you use them.
The Trumbull valley fairgrounds is not a great option as it is only available later in the game after you have progressed on the army story line. This progress is somewhat unpredictable but in any event it is only available later in the game. The fairgrounds are actually not even a much better option then the trucking warehouse as it has hardly more building options. In addition because it is late in the game you either have to hold back on building and reserve materials for when you move towards the Fairgrounds or you have to waste resources on builds that you have to redo at the fairgrounds. Also the one time I moved to the fairgrounds I lost 50 materials.. so it is not true that moving does not cost materials. But there might be a reason as my move was from the Church of Ascension to Savini towards Fairgrounds.. it might be that either having to many resources caused this loss of materials or that a second move might have caused this.
There are even more disadvantages to the Fairgrounds. It is pretty distant from most places.. so gathering resources mean you have to travel a lot and considering that both bridges have obstacles(and one on both sides!) it is a hassle to get around fast. Also the town near the Fairgrounds lacks resources and items to boot. In fact the entire office block at one side if the town is empty.
The Alamo is a small home base in the center of Marshall and it is almost no improvement on the Church of Ascension in regards to space and building options. It might be a base of someone who wants to play a hard game as it is basically open to all sides and you probably need all the four outposts it allows to cover the approaches to the base or see it constantly invaded by zombies.. It is therefore only an option for someone who likes a challenge.
Kirkman and Savini are on the same level and can be seen as the next step after the Church of Ascension and the Alamo respectively. However Savini is probably the better option because it is located at Marshall while Kirkman is located at Spencer’s Mill. Since your game starts in Spencer’s Mill, it is likely that by the time you can relocate a home base you will have exhausted most of the resources in that village. In addition most the middle game story-lines take place in Marshall and thus you would be required to travel a lot. Next to that, the Savini place can be protected by just three outposts.. allowing you to use the other three as moving bases, while Kirkman is open to all sides and thus needs more outposts to protect it.
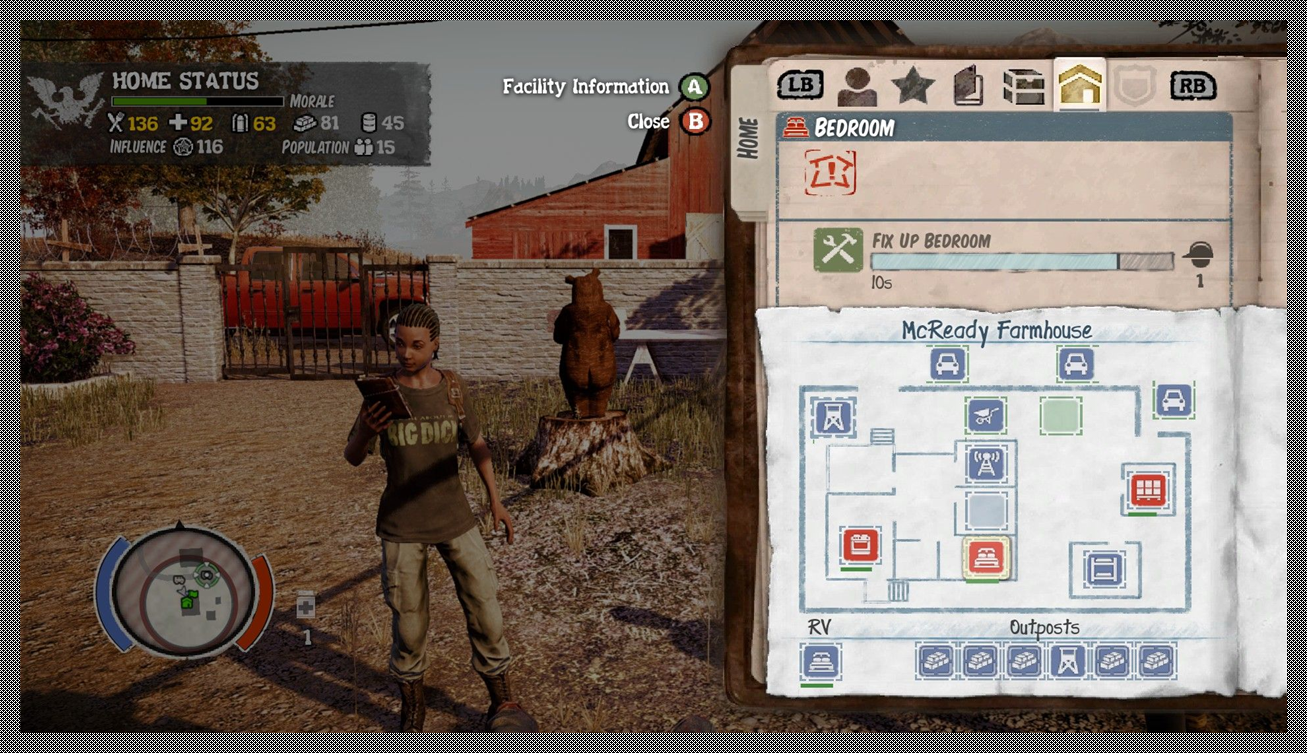
The McReady Farmhouse is the next step after Kirkman and Savini but has two big disadvantages.. the first is that you can not protect it with outposts like you can with the others and the other is that it is in the middle of nowhere with only a few roads.. Thus you will be travelling a lot.
The Trucking warehouse is probably the best option overall. However there are a few issues to be aware of. First.. the zombies are in the final release more dangerous than they were in the pre-release.. Hence it is imperative to make an outpost in the storage shed at it’s backside.. otherwise be prepared to see a lot of zombies filtering in from the back. Also it is probably wise to cover the whole front with outposts. I estimate that about four would be enough to protect the whole and this includes the one at the back. I you turn the petrol station near the bridge into another outpost you probably have a pretty save place. This still leaves you with three outposts that you can put anywhere you want.
There are even more reasons for the Trucking Warehouse and one is that it comes with an upgraded workshop. This can not be upgraded again or changed into a weapons workshop, but the fact that you do not have to spend 25(or was it 40) materials on an upgrade means you save a lot. Because it has many slots you can build almost everything except for one thing. I usually do not build a training area(see below picture).

- Snyders Trucking Warehouse, personally my favorite.


- McReady Farmhouse is smaller then the Warehouse and more vulnerable as you have just one building near that you can turn into an outpost.
Influence and fame
Influence is simply the currency of the game. You gain influence by doing missions or getting resources and items.
Influence will be limited by fame. You can have more influence than fame though, but that influence will drain away slowly. And remember the game keeps on running even when you are not playing. So eventually your influence will be reduced to fame.
Fame itself can be increased by doing missions.
One trick to prevent influence from draining away is using some of your community members to store items. These can be turned into influence later on.
Another way to manage your in influence is to stick to companions you get via missions and not recruit a special companion..Usually there are enough missions to go provide you with one, or even two, companions..
Missions
Missions come in two kinds: plot based missions and random missions. The first are fixed missions that you get when certain conditions are met and usually one follows the next.
Random missions are almost all aimed at killing of zombies or saving or protecting someone’s butt from zombies. There are only a limited set, so you will see them being repeated a lot during the game.
Random missions are on a timer, meaning that they will expire after a while. Plot missions are often not on a timer, except for one involving The Law. When a mission expires it usually has a negative effect on moral and might cause one of your members to disappear. Might, because I have never had this experience, but then I let missions involving community member seldom expire.
Be aware that when you team up with someone as part of a mission (of both types) that someone might leave you to hang out to dry the moment the mission is over regardless of what condition you are in or how many zombies are around. This can leave you to face a bunch of zombies alone without a car near. So make sure that you always got a backup plan to get out. I always make sure a trusty modern pickup is parked nearby, but remember: they attract zombies so you might have to fight some to get to it.
It is wise to listen to Lily(the girl that speaks to you over the radio) for she sometimes give you advice that you better follow. So when she says to gear up.. gear up!
Companions
After a while you will be able to recruit other people to head out with you for 100 influence. This is a good investment because you can easily get them back by scavenging. Since you can switch between your companions when they are friends, as long as they are not tired or hurt, you can use them to store more equipment.
There are a few things to take note of.
When you accept missions of others companions might leave. Especially in all plot missions they leave the moment you accept and they can even leave the moment you just clicked the mission area on the map. Also survey quests makes them often leave you.
(update November 2013)
In some occasions the companion you recruited will leave when accepting a mission in, some case they do not. I have not find a predictable pattern.
Many missions give you a companion for the duration of that mission. Since most missions end after reaching a certain area(returning home for example) or killing a certain group of creatures you can take these companions along until that condition is met. While you can not do other missions with this companion or switch characters, you can take these free companions with you to protect you while you scavenge, establish outposts and relocate bases.
(update November 2013)
In quests where you are ask to hunt a certain special zombie or to clear away an infestation the companion you get during that mission will leave you at once when the goal has been reached. This might leave you suddenly without any help. This can be annoying and dangerous.
There seems to be a catch in the game in that the more companions you have with you, the more zombies are generated around you. So having a companion around can be a bit of a mixed blessing.
(Update November 2013)
When you have to go home quick or find yourself stuck in the middle of nowhere, you can deal with the situation by switching to another character. Your old character will walk home, but there is no worry about him or her being hurt. Those characters are invulnerable.
Freak zombies
Freak zombie are special zombies. There are five types: armored zombies, rotter zombies, big uns, ferals and screamers.
Armored zombies are basic zombies but armored. Guns have little effect on them unless you shoot them in the face. Otherwise they just take longer to die.
Rotter Zombies are the type of zombies that explode in a cloud of toxic gas. Keep your distance from them and shoot them in the belly. Do not drive a car into them as you will get thrown from the car and the car is unusable as long as the cloud is in it.
Big Uns. Big and slow. although it can charge for a shot distance. A big un or juggernaut is very tough and very strong. The easiest way to kill it is to throw molotov cocktails at it. Four is usually enough to soften them up to be killed. Probably a grenade launcher might work as well, but I have not tried that.
Ferals. Nasty, tough and fast, They might be mistaken for normal zombies. They jump around quickly and pounce on you. Once they have you in a hold it is hard to break it. They can take a lot of punishment.. perhaps as much as an armored zombie. However they are prone to be bashed to the ground with blunt weapons. Just keep bashing them.
Funny enough they have a predictable pattern of jumping. When you drive at them with a car they jump to the side and when you immediately swivel the car into the direction they jumped the car usually will intercept the feral in mid jump as it tries to go for your car door. It is surprisingly easy to kill with a car.
I also noticed that shooting it in the head from a distance will work too as it just seems to ignore you pumping it with lead until it is dead.
Screamers are by far the most annoying zombies. Screamers are often the center of an infestation and usually come in pairs. They scream to stun you and attract other zombies(hordes even). Usually they are protected by a large group of zombies. The tactic is to lure the protecting zombies away and then shoot the screamers in the head. If you are handy with molotov cocktails that will work too. A grenade launcher worked also in once case. Cleared them out in no time.
Guns
Want a party? Bring a gun.
Guns come in all sizes, but break down in four categories: pistols, revolvers, rifles and shotguns.
Pistols and rifles can be silenced, revolvers and shotguns can not.
There are also grenade launchers in the game.
Making loud noises attracts zombies, hence firing un-silenced guns will get you their attention.
Interestingly the revolvers and shotguns usually make the most noise. On the other hand, they do usually more damage.
Getting automatic or specials weapons is hard task. There are only a few places where you stand a chance to find something special, which is the police station in Marshall, where I found automatic shotguns and grenade launchers, and the military camp up north that gave me a machine gun and a military grade grenade launcher. The loot seems to be random so you might find nothing much and the military camp is only available late in the game and swarming with freak zombies.
Later on in the game you can buy a few guns from others, but they are a basic selection probably to make sure you at least have the option to get them.
My experience with guns is that they only useful in special cases, but not as an option to replace hand to hand combat. For one; guns make loud noises that attract nearby zombies and in fact the game seems to generate zombies when you make a lot of noise(and a lot of them to boot, especially later in the game).
In addition there are no magazines in the game. Bullets are stored in your inventory as separate items and you can have 30 bullets per backpack slot. This means that even if you find enough bullets you can not really go on a killing spree unless you keep close to an outpost. In addition a gun can only be reloaded when you stand still and I found that when you need to reload you never get around doing that unless you can have something that keeps the zombies at bay, like standing on a platform or behind a barricaded window.
Next to that: zombies can take a lot of bullets unless you aim at the head. I found that at time a pistol with seventeen rounds could be as effective as a machine-gun with a hundred rounds. Just head shot them.
Shotguns are good weapons for rubbing out a horde if you keep your calm. You need to have them really close and then unload it at head level. What remains can be killed off by hand. Shotguns are especially handy when zombies are forced to use a narrow opening to get at you, like a window or a door.
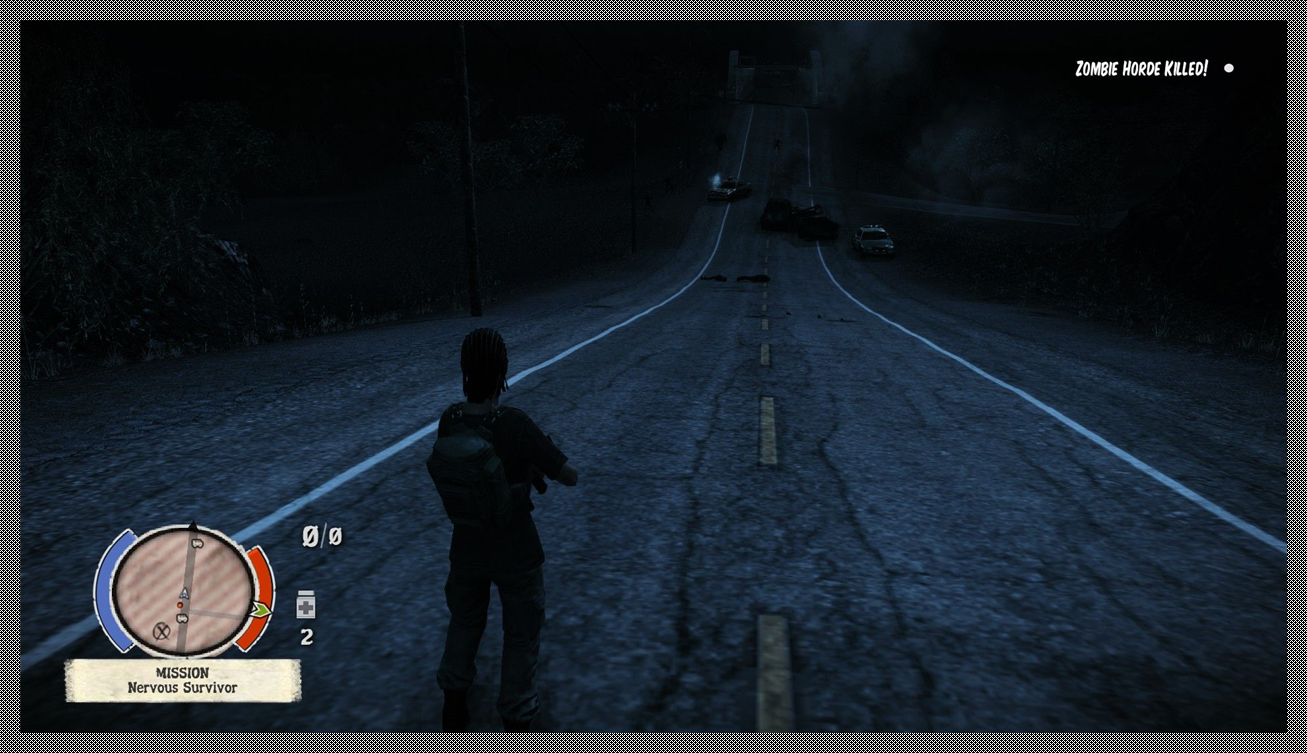
Grenades, grenade launchers and Molotov cocktails
Thrown grenades and other incendiary weapons are handy to kill groups of zombies. Throwing needs to be trained though. The aim in the game makes you overthrow your target so you need to get a good feel of how to throw. Molotov cocktails are somewhat better than grenades because grenades make a lot of noise.

- Grenade launcher in action

- Grenade launcher in action
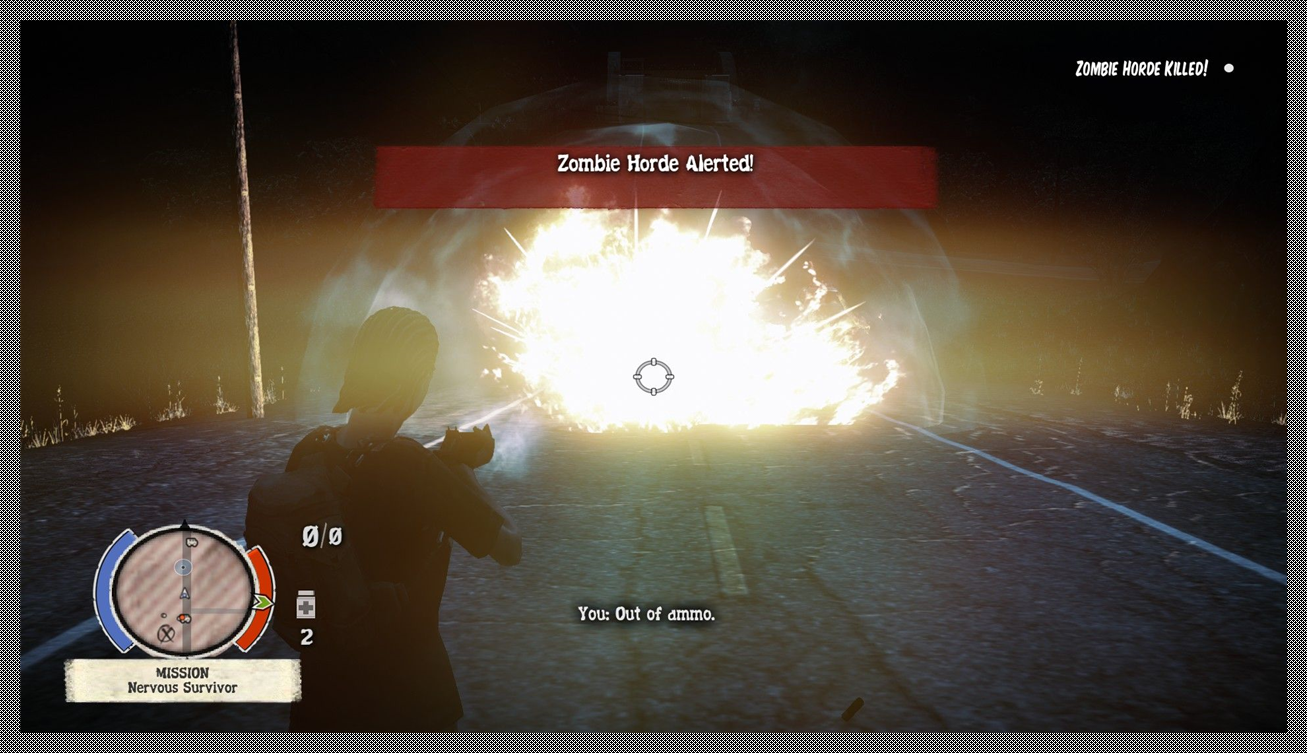

- Grenade launcher in action

Gathering and using resources and items
There are many places where you can find resources and items. Mostly they are inside buildings, but sometimes you can find them in fields and thickets. There is a certain pattern to them. Sheds and construction sites will have resources and fuel, stores will have food, guns shops and the like will have ammo. Normal houses can have anything, but tend to lean to medicines and food. Fields have food.
Searching resources takes time. And usually it generates zombies nearby. They might not always find you though. The search time is reduced when your wits level increases.
When you search a house you can find two types of things: resources.. which is usually called a stash, and items like weapons or bottles of pills.
Resources can be taken with you. You do that by pressing E and hold it down. Be aware that if you remove all the resources, the place will only generate ammo if you turn it into an outpost. You can only take one resource with you at a time and it makes you encumbered and you need to deliver it to your homebase. Items can however be dumped in outposts.
.
I do not know if items become available again after you remove the outpost.Another unknown thing is if a house that is not researched in total will keep on generating items. I got the feeling that certain houses I searched, but not in total were searchable again.
A very important thing to be aware of is that when you leave items to be collected later that they might disappear. This is actually pretty logical. Some other group of survivors might have taken them.
Note also that you can not put items from your backpack into the containers you search. It is one way only.
Game pace
The game is relentless and it keeps on going even if you are not playing. During a play session, the only way to pause the action is by going in to the menu, but even if you do that a long time I noticed that you will find things have changed the moment you return to the game. So going into the map to get your bearings will not stop the game and therefore make sure you are at a place where you are not suddenly attacked by zombies.
Game saves
Normally there is just one save and with each event or mission the results are immediately saved into the save game. Hence you can not normally reload to a previous state after having your favorite character killed.
However on the pc you can locate the save game and copy it to another place. So if your favorite character is killed, you can copy the old save back to the original folder. This can also be used when you play the next day and you find the results to unfavorable. Just close the game, copy the backup again and see what the result is.
Not that you must be either in the main menu or have closed down the whole game before copying the old files.. otherwise the game will just write over these old files.
The save game is located here:
On a 32 bit windows computer:
<drive you installed the game>:\Program Files\Steam\userdata\108132632\241540\local
On a 64 bit windows computer:
<drive you installed the game>:\Program Files (x86)\Steam\userdata\108132632\241540\local
Night, day, dawn, dusk, noon.
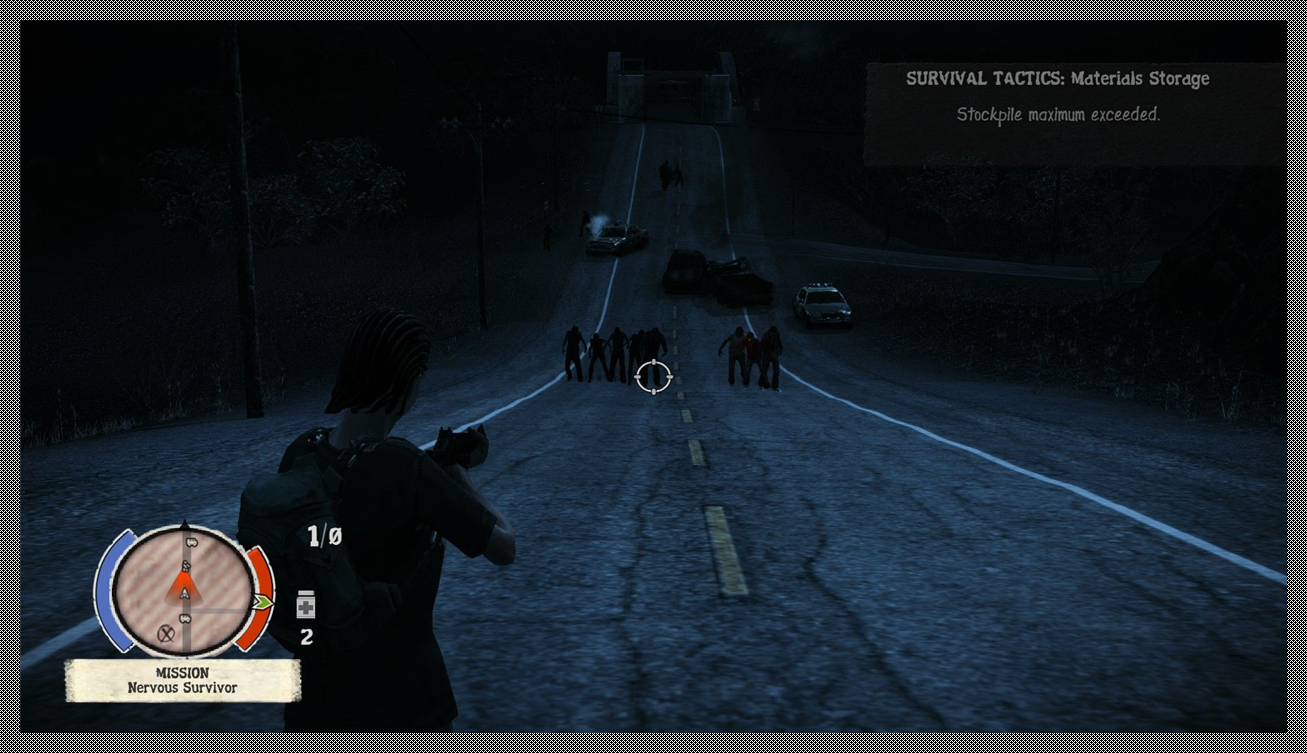
Night is the nastiest time. There are more zombies roaming around and they are much harder to spot. Since light seems to attract them as much as noise, having your lights on will alert nearby zombies. Especially inside buildings you have a hard time to see what you are fighting. Zombies do have distinct glowing eyes, but who is counting those when you are busy clubbing them. The day and night cycle in the game in based on an one hour real time scheme. These represent in game days. The daily resource need as shown in the game for the needs of your home base are real time need. That is what one real day will require.

.

Neighbors & Other survivors(Update November 2013)


One activity to do in the game is to gather survivors and deal with those that do not join your group. Gathering survivors to join your group is a double edge activity. More people means you have more player characters to play with, but they also are more mouths to feed and more beds to fill. More player characters are nice as usually a few of your group will be tired, hurt or sick.
There are basically three groups of survivors. Those that are plot related like the Wilkersons, The Army, The Law and The Grange. There are a few survivors from the Law that will join you after a certain plot related event, but the others will never join you. I have heard that the Wilkerson might join you if you pursue a certain route in the plot line.. but I have never tested this as I simply do not like them and they are way out in a zombie-horde infested place. In all it is too much bother to try and curb their favor.
The second groups are those that will join you.. these usually come available as missions like a group of survivors asks to join you, or a stranger located or survivor activity reported. These will join you at the end of the mission.
The third group never seems to join you.. These are invariably announced as neighbors, have their own base(called enclave) and they are random groups that suddenly appear. I have never been able to have them join me. I even tried with one that had complete trust, but they did not want to join. Usually these enclaves of survivors disappear. They seem to get assaulted the whole time until they eventually die. Sometimes they give you barricade missions and sometimes the dead survivors leave rucksacks behind you can take home.

Leave a comment